The making of The Santa Photos Lantern
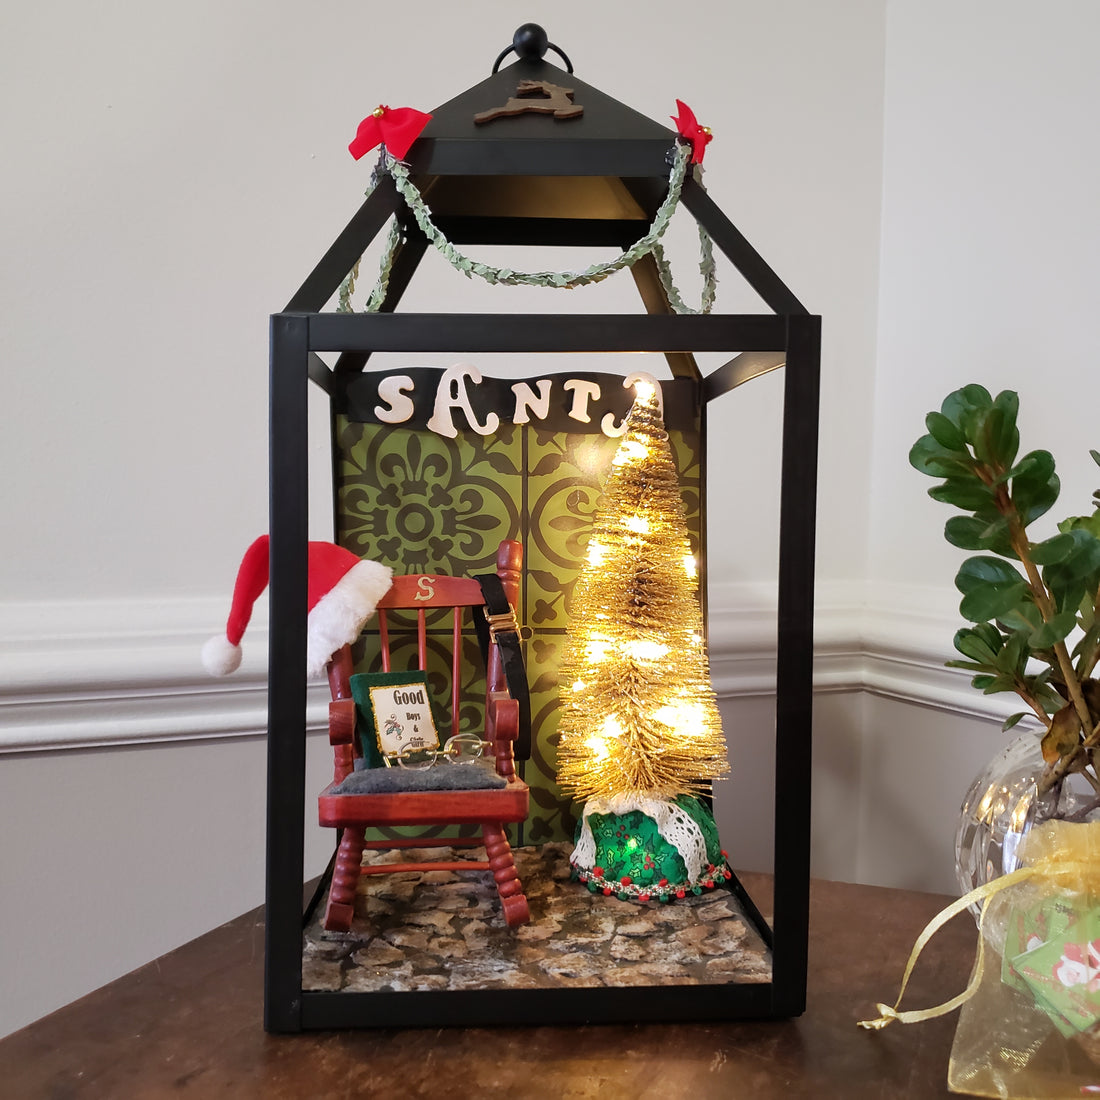
I'D BETTER BE GOOD...SANTA'S COMING AND HE KNOWS...
When it comes to crafting, my heart is all about the crafting of a story or a memory. I love it when someone looks at one of my pieces and says something like, "Oh that brings back a special holiday memory for me...". Makes my heart sing!

This piece holds true to that philosophy. I found this beautiful black shell of a lantern on sale and thought it would be a great place to start.
STEP 1:
I began by placing a simple back drop wall with a piece of scrapbook paper I found in my stash. Where was I going with this?
...an outdoor gazebo what do you find under an outdoor gazebo in the winter...carolers...a couple kissing under a mistletoe... teens taking selfies... then it hit me... SANTA!
Still not sure what I was making, the lantern had no floor, so
STEP 2: I measured out a template, cut a piece of cardboard to fit the bottom.
I needed a natural element, choosing a stone floor, so as to not steal the simplicity away from the scene. The stone floor is one of my favorite parts of this piece!


- I painted the base cardboard with a deep grey acrylic paint.
- then tore small pieces of a cardboard egg carton (I chose the bumpier parts of the egg carton for the texture of the stone.)
- glued the pieces randomly to cover the piece of cardboard with watered down tacky glue. (This allowed me to manipulate the cardboard if necessary.)
- I let it dry for 24 hours.
After the 24 hours I dry brushed with deep grey, maple syrup brown, black and gold metallic acrylic paint. I then glued down the whole piece to the bottom of the lantern with E600 glue. It turned out better than I had hoped.
STEP 3: SANTA NEEDED A CHAIR! 
I duplicated my small Santa chair with its hand crafted bits -
- a leather belt and red felt hat
- Santa's green felt book of "Good Boys and Girls"
- creating a soft grey seat for Santa to sit
I added some spectacles and the gold letter "S" in the center of the chair back.
STEP 4:
I found the perfect gold bottle brush tree at the $ Store, but when I got home it worked but didn't wow me. (I am one who needs to be WOWed!) It sparkled but needed lights! Santa can't sit by a tree without it being lit!
STEP 5: Added lighting and a tree skirt to the tree.
I soon realized that this could be an outside gazebo, but maybe a mall gazebo, a leveled up platform in a department store, a school backdrop, or and elementary school stage...I needed to keep it simple enough as we all have the memory of getting our picture taken with Santa, but the place would be different for all of us.
Step 6: The space on the top of the lantern needed some festive fun! I had some miniature wooded reindeer, painted them gold and glued to the roof.
It needed greenery....
Step 7: I decided to hand craft the holly garland myself. I like the pine garlands, but felt the holly would add a special touch...

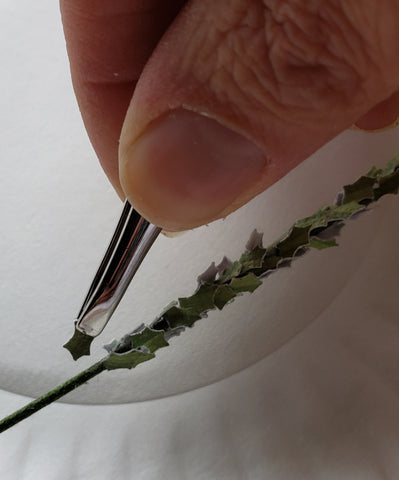


- I punched out 400 miniature holly leaves with my fiskar punch
- glued them around a 20 gauge floral wire
- this made approx. a 10 inch wire
- I made three more 10 long wires
- attached them to the corners of the roof
- added red bows to polish off the look
I think next time, I would use scrapbook paper that had color on both sides. This looks fine, I think the white on the back side just dulls the color a bit much for my liking. (Just a little artist constructive feedback) 
STEP 8: (Final Step)
I created little coloring books on my computer and added them in with some small candy canes I had in my craft stash. I also found the perfect miniature basket as Santa always handed you a candy cane and/or coloring book. (Sweetest candy cane of the season!)
- glued a few of the coloring books together
- glued them into the miniature wicker basket
- glued in a few candy canes
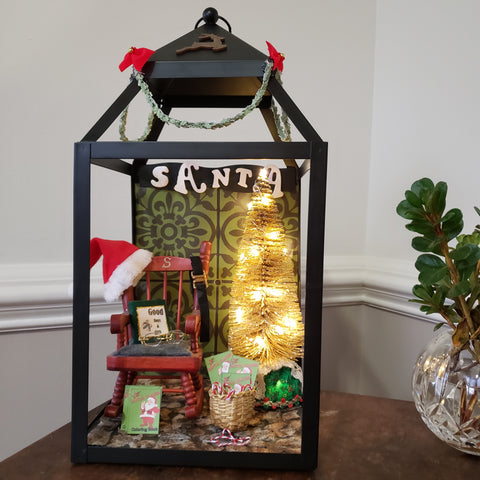
The scene is completed and I just love it! I did not tack down the items like chair, tree or basket and left a few of the candy canes and coloring books unglued so they can all be placed as you may remember.
I hope this scene brings as much joy to you as it did to me while making it.

"He's making a list, checking it twice...gonna find out who was naughty or nice...Santa Claus is coming to Town!"